Monday, December 30, 2013

Year End Reflection and a Last Minute Dress

2013 is drawing to a close, and I've been reading everyone's "Top 5 Hits and Misses" around the sewing blog-o-sphere. These posts can be fun, but they also give me a tinge of guilt. Should we look back at my New Year's Re-sew-olutions from January?


1. Finish sewing my jeans - Ha! Haven't touched this one since 2012, but I don't really care. I bought Kenneth King's Craftsy course on copying your jeans, and I have a feeling I started out all wrong on these anyway. Maybe I'll work on this in the New Year, maybe not.


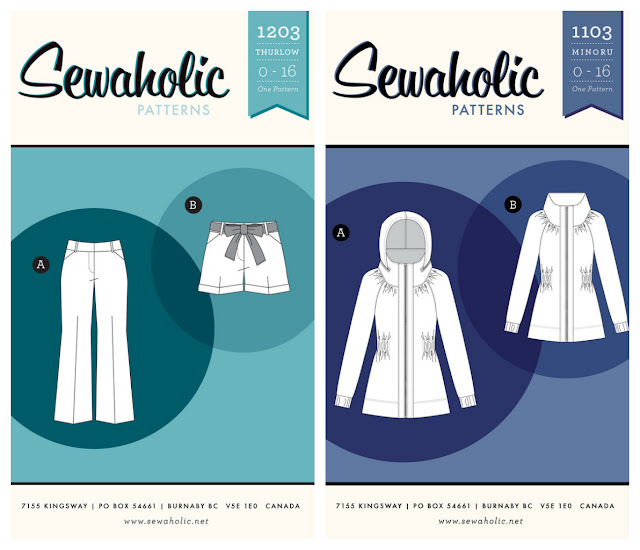
2. Make some Sewaholic Thurlows and a Minoru - I can happily say I finished my Minoru, and I've been wearing it all winter.


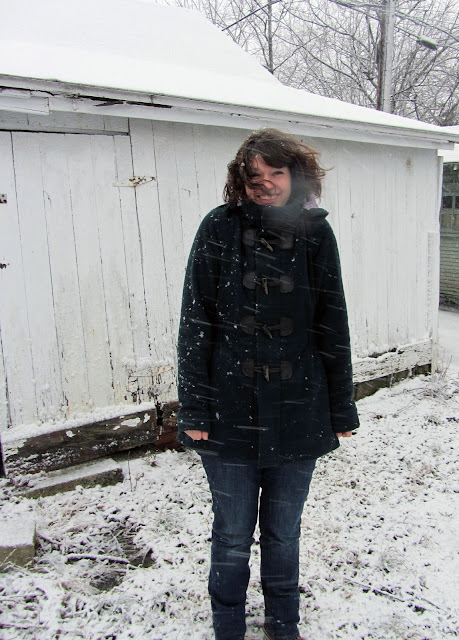
The construction may not be perfect, but this project taught me that it doesn't always matter. I get a lot of wear out of this baby, I get a lot of compliments, and no one notices the imperfections.

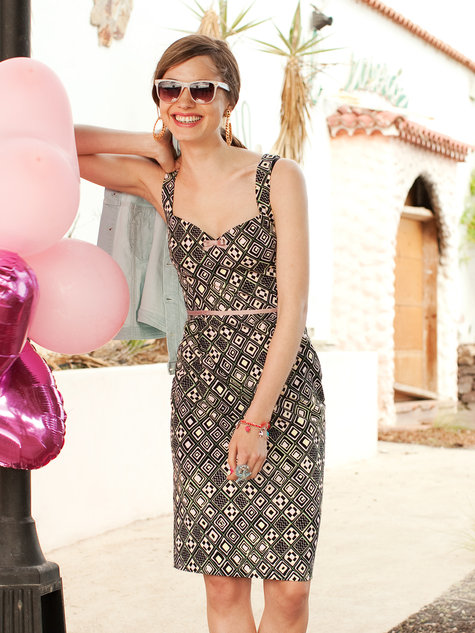
3. Participate in a sewing contest on Sewing.PatternReview - Guys! I'm so close to this one! After I got some selfless Christmas sewing done, I decided to try to squeeze in a project for myself before the New Year. SewingPatternReview is having a cocktail dress contest, and I've been working diligently for the past three days so that I will have something sparkly to submit. Wanna see?


It's McCalls 6433, a pattern which has been in my stash for quite some time.
I had actually set this pattern aside many months ago, thinking I didn't like the style anymore and I'd give it away. Then I saw a bunch of very cute versions...

Sew Busy Lizzy's little red number
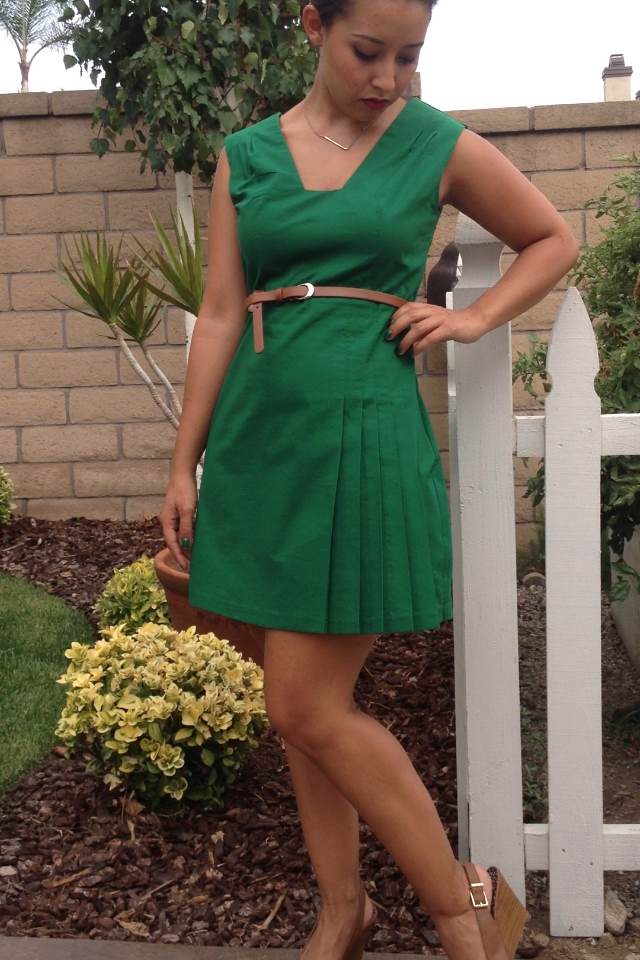
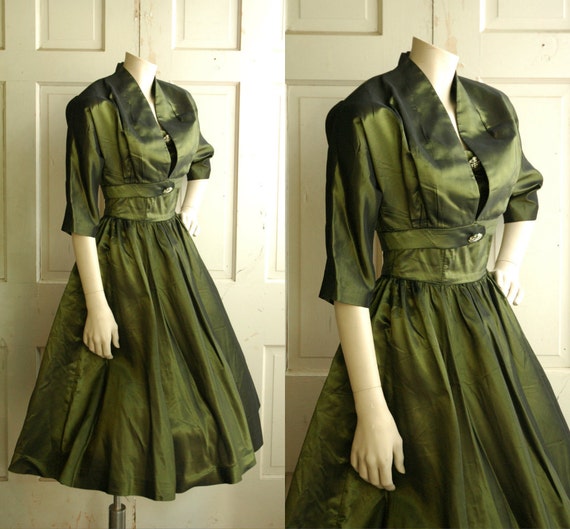
a lovely version in emerald green by the Seamstress from Venus
awesome fall version by the Modern Mantua Maker
...and they inspired me to give it a go. The fabric came from Joann's. It's an interesting blend which is mostly cotton and linen and trace amounts of polyester and something listed only as "other." I'm going to guess the "other" mystery fabric is the bits of silvery tinsel that give the fabric its sparkle. The sparkle doesn't show up too well in these photos, but trust me, it's there.


As much as I like to scoff at Joann's, it seems as though my local one is carrying more apparel fabric these days. This is one of the fabrics that grabbed my eye when I was shopping for Christmas gift fabric for others. I held off til after Christmas, but then I couldn't resist any longer. I guess it was meant to be, because as the lady was printing out my ticket she told me it was actually a clearance fabric (cha ching!) and it was half-off on top of that. Sooo $3.50/yard. Not bad, eh? Let's just hope I can get this together by tomorrow in time to submit it for the contest!

Okay, back to the resolutions...

4. Sew something for Josh - No comment. Okay, fine. I actually went and bought McCalls 6044 for him, a pattern that a commenter kindly recommended to me at the beginning of the year. So baby steps. Maybe I'll get there sometime in 2014.

5. Sew something in green - Specifically, emerald green, which is Pantone's Color of the Year for 2013. I sewed a sleeveless blouse that was shades of green...


Hmm. Well maybe I'll carry that resolution over for the new year. I'm not too keen on the new Pantone selection for 2014 anyway.


Radiant Orchid - maybe it'll grow on me. Who knows.

6. Do some giveaways - Pretty sure I did that at least once. Once is good. Okay, maybe I could do a few more in the future. Especially as I've been pretty lucky in the giveaway department myself lately.

7. Blog more - I posted 24 times in 2012, and 30 times (this makes 31!) in 2013. I'll count that a success. But I also have a lot of drafts of posts which I oughta finish up and publish. For instance - professional photos of the wedding dress, things I sewed for Christmas gifts, etc. But all that has to wait while I go finish up that cocktail dress. Wish me luck! Hopefully I'll be able to cross off one more resolution for 2013!


Thursday, December 5, 2013

Do you heart Kaffe?

After Josh's comments about my Kaffe Fasset striped dress, I started searching around for other people who have used his fabrics for clothing (and not just for quilts). Well lookeee what I found:


A rainbowy striped Cambie Kaffe by Rosie on Kollabora. Isn't it cute! Like stripey candy. And then there's...


A cabbage Kaffe dress by Jorth. Maybe it's her fantastic smile that's selling it, but I'm pretty sure the dress is also awesome. And next...


Another Kaffe sundress by Rosie again! Lovely. But there's more...


A Kaffe tunic in toned down hues, by one Nicole on Kollabora. I'm liking both her tunic and her canoe. And finally...


..this adorable little girl over at youandmie.com.

How do you feel about Kaffe Fasset fabrics? Should they stay in the realm of quilting and children's cloths? Are they not for the faint of heart? I have mixed feelings about his designs. Like Amy Butler's, Anna Maria Horner's prints, I think think they are beautiful, but sometimes I also think they scream "I LOVE TO CRAFT!!!!" when maybe that's not always the message I want to send. What do you think?

Saturday, November 23, 2013

Holiday Sewing Fantasies

When it gets around this time of year, I can't help fantasizing about all the elegant, festive, glitzy, shiny, sumptuous clothing I could sew in name of the holiday season (if I only had the time). There's something so enticing about the sewing possibilities at this time of year. I love thinking about different fabrics - lustrous velvets, crisp taffetas, brocades with metallic threads, sequins! - and all the beautiful things they could be made into - sleek cocktail dresses, froofy party skirts, jackets with fur collars. Aah! It's all too good!


I have to get it out of my system, where or not I have the opportunity to sew something up for the holidays. So here is a list of things I've been fantasizing about sewing lately.

A brocade coat with metallic accents and maybe a (faux) fur collar...

available on Etsy
Wouldn't that be perfect for wearing over a festive dress? You know, on my way to the ballet? No, I don't have tickets to the ballet, but if I had this coat I might buy some! The coat above is beautiful, but I think I'd go for a shorter jacket. I have McCalls 5668, which I think could be a relatively quick sew:


Ooh! It could have a gold belt buckle. Or gold piping on the princess seams! Or some sort of jewels sewn onto the collar.

Next fantasy (and one that has been in my mind for years) is to copy this skirt sported by Emma Watson in a  Teen Vogue photo shoot a long while back:


You can see more photos from that photo shoot here. Really, I'd like to copy any of those outfits. They check all the boxes on my holiday fantasy list.

Item 3 - a luxurious silk velvet robe to lounge around in.


This one is from a company called Soft Surroundings, but mine would be a short version because let's be honest - I can't afford that much yardage of silk velvet. This item is also practical, because I don't need tickets to a ballet or a fancy ball to get use of it. But I might need to wear lipstick while wearing it. Silk velvet deserves a little effort.

Item 4 is something quite attainable. I'd like to copy Kathy's twist tank in some sort of sparkly or shiny fabric:


The fabric on the right is Robert Kaufman "Radiance" cotton/silk sateen, and I bet it would do awesome for this pattern. It also comes in a wide array of colors. I could even choose a different fabric for the over and under layers! That would make it entirely reversible, right? Or maybe I could embroider a little beadwork at the bottom of the V neck? Gonna be thinking about that one for a while...

I could go on, but homework is calling. What would YOU like to be sewing this holiday season?

Friday, November 22, 2013

Simplicity 2177 à la Kaffe Fasset

I plowed ahead on my homework today, finished a paper, and actually snuck in some sewing time this evening! Since I'm feeling industrious, I thought I'd go ahead and share what I'm working on. After finishing my sister's wedding dress in August, I treated myself to a fabric purchase at Crimson Tate in Indianapolis. It's a cute little store that stocks a mix of quilting and apparel fabrics. Sometime I will have to go take some pictures of what they've got to share with you. Anyway, I walked out of the store with this:


It's a Kaffe Fassett print called "Roman stripes" and the colorway is called "dusk." You can buy it online from Hawthorne Threads here. Careful when you click that link! I find all the different color options dangerously appealing.

I didn't have a project in mind when I bought this, but when I went through my collection I knew it would have to end up as Simplicity 2177, which is made for stripes.


I bought this pattern a while back after seeing the Slapdash Seamstress post this inspiration photo of a J. Crew dress, which is a pretty excellent match for this pattern:


Here is her post on her own make. I've had the photo pinned for quite a while, and the dress is no longer available through the J. Crew website. One thing that I think makes the Simplicity pattern superior to the J. Crew dress is the dart placement on the bodice. You can kinda see on the left side of the J. Crew dress that the dart cuts across the stripes, creating an awkward offset in pattern. The darts on the Simplicity pattern are in the center and point from the triangle inset in the direction of the stripes, so it minimizes the offset that happens. (Or at least it seems that way to me.)

Actually, at first I thought I didn't want darts on the front at all, so I went through a bunch of effort to convert them to gathers. I didn't follow a tutorial, so I'm not sure this is the proper way to do this, but here's what I did. First I closed the dart, transferring the dart to the armhole...


Then I closed up the armhole and transferred the excess back to the front again, only this time in many small slashes...


Then I filled in the space between the slashes and marked a gather on the spot. I hope that makes sense! If there's a nice tutorial out there for this process, lemme know. After all that work, I didn't even like the way the gathers looked, so I ended up going with the original design. I guess I was thinking that gathers were the best method for not interrupting the striped pattern, but maybe the angularity of a dart goes well with the lines of stripes?

I'm glad I made a muslin, because I ended up making several pattern adjustments. I had to get rid of some gaping at the back neckline by transferring the excess to the dart at the waist. I also had to take in a little gaping at the front armhole, transferring that excess to the bodice dart. It was my first time trying both these alterations and it worked great. What else.... oh. I had some tightness in the back. This was a weird one, because I had to slash and spread, but that combined with the back neckline alteration was really messing with my head. My darts in back are now pretty big, but the fit is good, so I'm going with it. I love it when you go through all that geometric tinkering with a pattern and then it actually WORKS. Amazing. I'm actually sitting in the couch in my muslin of the dress right now, and it's feeling pretty comfy. It's good to wear your muslin around the house for a while. It's really the only way to tell if you've gotten a good fit. For instance, at first I thought this dress was a little long and that I should maybe take a few inches off the hem. But then while sitting at the sewing machine I noticed that it rides up quite a bit when I sit down. Makes sense, since it's gotta curve over my booty when I'm seated. So I'm leaving the length alone.

I'm underlining the dress in cotton batiste, because it's rather thin material. Tonight I finished attaching the underlining to the main fabric.


At first I considered hand sewing the two together, since it's easy for the fabric layers to slip around when doing this part. But instead I just put my walking foot on my machine and went for it. It worked just fine - I didn't even pin a lot of the edges. I guess all that money I shelled out for my walking foot was worth it. Maybe I'll use it more often. You can't see it in this photo, but I sewed strips of organza around the armholes and the back neckline of the bodice so that these areas won't stretch out. I didn't bother doing this for the neckline, since it's not cut on the bias. Is that reckless? Instead, I just used a short stitch length to attach the underlining to the main fabric, and I'm hoping that this stay stitching is enough.

Here's the front of my bodice sewn up:


Isn't it so prettyyyy? I love the colors in this fabric. They are like autumnal jewel tones. I showed Josh, and he was not such a fan. He asked me if I ever considered sewing with solids. SOLIDS. As if. He wasn't a fan of my birthday dress fabric either. He said the zigzags looked kinda 80s. Clearly, there is a discrepancy between his tastes and mine. Is my style too loud? Outdated? I know I'm not riding the front end of the trends, but I think this striped dress is gonna be awesome. What do you think?

Can you imagine what he would have said if I had chosen one of the other prints by Kaffe Fassett?


Love 'em. Maybe I'll have to go back and buy another couple yards of one of those...

Friday, November 15, 2013

Better late than never

Where does the time go? It's pretty disconcerting how easily the months slide by lately, but I'm trying not to worry about it. I started a new graduate program this fall, and although I've been careful to take time for certain crucial activities...
apple pickin
homemade apple fritters (thanks to Josh)

Live music at Lotus Fest (Dhaka Brakha - they are amazing!)

running/hiking when the leaves were at their peak
 ...I haven't been doing as much sewing. But I do have a finished project to share! Way back at the beginning of summer, I blogged my plans to sew a birthday dress from this cute Burdastyle sweetheart dress pattern:


In this fabric:

Well it did eventually happen, but not in time for my birthday. It did happen in time for a fancy night at the museum where I intern, however, which was equally satisfying.


I love how this dress turned out! This project feels like a huge win because I don't think I could ever buy something similar in the store - it simply wouldn't fit. The ratios of my measurements don't exist in off-the-rack clothing, at least not that I've ever found. Earlier this year I searched in vain for a career-wear sheath dress that could handle my shape, but everything that fits me in the waist and bust is far too small in the hips. If I didn't know how to sew, I'd be restricted to A-line skirts. If I didn't know how to sew, I'd still be thinking that my body shape was the problem, instead of seeing that ready-to-wear clothing uses standardized measurements when no single body is standard. Sewing is awesome, and wearing this dress makes me feel like a million bucks.


I got so pumped about this dress, I whipped out my gorilla pod and the self-timer and took about a zillion pictures of myself as I was leaving the museum that night.


Just missed the sunset, unfortunately. But the lighting in the stairwell to the parking garage was pretty dramatic...


I ended up extending the side panels on the bodice all the way down the skirt. I guess I should have just stuck with my original plan to use Colette's Lily pattern. There were a couple problems with using the zigzag print for the entire skirt. First, it was a little overwhelming when stretched over the widest part of my body:


A little much, right? Second, there was this:


I swear I matched the pattern before I cut... but obviously something went wrong. Putting in the black side panels took care of both of these problems, and also allowed me to get a really good fit by creating princess seams. I'd still like to try this pattern with the original skirt (which has pleats and is less fitted) - just maybe in a solid or a a print that doesn't have loud, horizontal zigzag stripes.

I'd say more about the construction of this dress, but the insides aren't much to brag about. I pinked a lot of the seams. I suppose that's pretty lazy, but with this fabric (stretch sateen) I think it works. I did add a little pocket which I quite like:


It's basically an in-seam pocket at the waist, and I made it just big enough to hold a library card. In case, ya know, I decide to wear this dress to hang out at our public library.

I used two different materials for the facings because the main fabrics are so contrasting. This way, if the facing pokes out a little it won't be blatantly obvious (which it would be if it were all black or all white). I remember that figuring out how to attach this cut this facing, piece it together, and attach it to the bodice made my head hurt, a lot. Ever staring at it now is making me confused. Hopefully I won't have to do this again soon.


Thanks timestamp, for reminding me just what a procrastinator I am. On the other hand, it makes it easy to aim for improvement! All I have to do is post my next project before April!

See ya soon! (I hope!)


Thursday, September 12, 2013

Wedding Dress Completed!... a while ago!

Hey everybody! In case you've been waiting in tense anticipation to hear whether or not I managed to finish my sister's wedding dress in time, you can now relax. It got done! As you might have noticed, blogging had to take a backseat for while to make room for actual sewing, and then also to make room for quality time with family, starting a new graduate program in another town, and a cat crisis (he's now okay).

But back to the dress... Here's a photo to give you some relief...


I know it's not the best quality photo. I'm waiting on the photographer (our sister-in-law Susanne) to send the official shots. I will unload those in a big beautiful post later. Susanne takes beautiful photographs. Until then, you'll have to be satisfied with construction shots.

The bad part about blogging so long after the fact is I'll probably forget a lot about the construction details, and my interest in them is also fading rapidly. I do have several hastily taken snapshots of the last bits of construction though, and I'll tell you what I can about them.


Above is a snapshot of the insides of the front of the bodice. It was tricky getting those seam lines at the the neck to match up properly, especially with the trim. I trimmed my seam allowances and hand-sewed a lot of them down, to keep them discrete and in place.

We ended up having to sew in some bra cups last minute to pad it out a little. It was a minor fitting issue, and I'm very happy there was nothing worse that that!


Sure, I wish those were concealed better, and that they were proper bra cups and not something I yanked out of a swimsuit last minute... but they did the job! Perhaps I shouldn't be so flippant about my sister's wedding dress, but I ran out of time for "perfect" - and I think that's just my style.


To solve the problem of the transparent back, I underlined it with silk organza and created a narrow lining for the waistband (hand sewn in place). For the arm and neckholes, I made bias strips and a facing that I wrapped around the raw edges and hand sewed down. Here's a pick of the neck facing below, which also included a facing for the zipper.


You can also see the waist stay in one of the photos above. It's a grosgrain ribbon that I sewed to the seam allowance where the skirt and bodice join. Since that seam ends up between the outer layers and the lining, I made buttonholes in the waistband lining for the ribbon to poke through.


That's a clever trick I learned from this post over at SoSewLovely. Her photos are incredible helpful! Her waist stay is sewn on differently than mine, but you get the idea. The lining material on Katie's dress is a very lightweight cotton batiste, so I stabilized the buttonholes for the waist stay with little squares of iron-on interfacing:


I was really trying to avoid using iron-on interfacing for this dress, but for this tiny little bit I really don't think it matters. Especially not when the deadline is fast approaching!

The skirt has two layers. The underskirt is the handkerchief linen, and the upper is lace underlined with organza. I wanted them to hang separately at the back closure, so I referred to Grainline's tutorial here.


You can see from this photo that I've got an invisible zipper sewn into the underlay. It's hand-picked, which I find just about as easy and fast as doing it by machine. There are silk organza strips stabilizing the zipper, although I forgot to photograph it. For the upper skirt, I sewed strips of linen (non-bias) along the slit opening, which I also forgot to photograph. These gave me something to sandwich the button loops between, and added a little extra strength for the loops and for anchoring the buttons. The loops are rouleau loops, which I had a hell of a time turning inside out. But I love the way they look! The buttons came from an Etsy seller and added the "something blue" to Katie's outfit. The Etsy seller advertised them as glass - they're not. I was disappointed, but we had no time to return them for something else. Really, no one is going to notice but me, and the overall effect was very pretty anyway.

There's a hand-sewn flower applique that overlaps the opening on the back of the dress:


It fastens in place with a little hook and eye:


And finally, here's a few photos of the finishing on the skirt hems. There were two layers of trim on the bottom skirt. I used a zigzag stitch to sew down the wide scalloped trim shown below. You can see there's a large amount of extra fabric to the right of the trim - that's all excess length that ended up getting used in a very wide hem. I'm lucky it was there, because I ended up needing it!


I used a straight stitch to attach another row of lace trim that covers up the raw edge on the wider lace:


I know that this narrow lace trim is meant to have a ribbon woven through it. Time did not allow, which is a shame, but at the same time I know that nobody else was going to notice this. Maybe it can be added on in the future.

Here's that extra wide hem, turned upward:


 It was perfect for concealing the horsehair braid around the bottom of the skirt:


It was sort of a beast to control the extra fullness of the hem. At first I tried using gathering stitches, but that just made a mess because my row of stitching didn't line up perfect with the top of the horsehair braid. I ended up putting little pleats in the hem instead. Then I wrapped the top around the braid and hand sewed it down. I love the end result, with the braid tucked neatly inside.


The upper skirt was finished a little less... elegantly. There's a double row of ruffled trim that I stitched down with a zigzag stitch, and another row of that narrow lace to cover the raw edge on top.

Here's the backside, which you can see is a little messy. I simple trimmed away the hem at the bottom line of zigzag stitching. It does the job, but probably is not the method you'd see on a couture garment.


And I think that's all I've got to say about this dress! In the end, there were many little things which I wish I had time to fix - neatening up the ends of the waist stay, inserting proper bra cups, replacing the buttons, putting ribbon in the skirt hem - but when she tried it on I thought she looked absolutely beautiful.


It was so satisfying to see it on her. I had some little doubts about the dress, as anyone might have after spending so many hours staring at something. But when Katie put it on everything looked right. The dress isn't perfect on its own, but my sister made it perfect.

So that's the happy ending to the wedding dress saga! I hope you enjoyed seeing the process and the finished product. It was a ton of work, but it was totally worth it. I'm just glad I have only one sister - I can't imagine doing this again!